Installing a large-scale ground-mounted solar system is not simply a matter of placing panels in a field. Before a single post is driven or a single panel racked, the land itself must be properly evaluated, cleared, graded, and stabilized. Inadequate site preparation is one of the leading causes of long-term underperformance and elevated maintenance costs in ground-mounted solar installations. Getting the land work right before construction begins pays off substantially across the 25-year operating life of the system.
This guide walks through each major phase of land preparation for large-scale ground solar projects — from initial site assessment through vegetation management and drainage planning — with practical guidance on what each phase involves and what can go wrong when it's skipped or rushed.
Phase 1: Site Assessment and Environmental Review
Before any equipment moves onto a potential solar site, a thorough site assessment is essential. This begins with a desktop review of aerial imagery, topographic maps, floodplain maps, wetland delineations, and existing land use data. It then progresses to a physical site visit covering soil conditions, drainage patterns, existing vegetation types, and potential environmental sensitivities.
Key items to identify and resolve during site assessment include the presence of jurisdictional wetlands (which may require mitigation or avoidance), protected plant or wildlife species, proximity to waterways, existing underground utilities, and any evidence of prior contamination or fill. Environmental review requirements vary significantly by state and locality but should never be overlooked — discovering a protected resource mid-construction is enormously costly.
- Topographic survey — identify slopes greater than 5–10% that may need grading or stepped racking
- Soil profile evaluation — bearing capacity, permeability, erodibility, and pH
- Wetland and floodplain delineation — required before permitting in most jurisdictions
- Threatened and endangered species survey — typically required for projects above 1 MW
- Underground utility locate (811 call) — mandatory before any excavation or post driving
- Stormwater runoff analysis — to determine drainage infrastructure needs
- Sun path analysis — confirm no off-site obstructions (tree lines, ridgelines, structures) will cause shading
Phase 2: Vegetation Clearing and Grubbing
Once the site assessment is complete and permits are in hand, the first physical work is vegetation clearing — removing trees, shrubs, and woody vegetation from the installation area. This process includes cutting and removing above-ground vegetation and grubbing — the removal of root systems and stumps below grade. Root systems left in place decompose over time, creating voids in the soil that can cause settling and foundation movement.
The clearing boundary should be defined precisely to avoid removing more vegetation than necessary, particularly near buffer zones, wetland edges, or property lines. In many jurisdictions, a Stormwater Pollution Prevention Plan (SWPPP) must be in place before ground-disturbing work begins, and erosion control measures must be installed at the site perimeter before vegetation is removed.
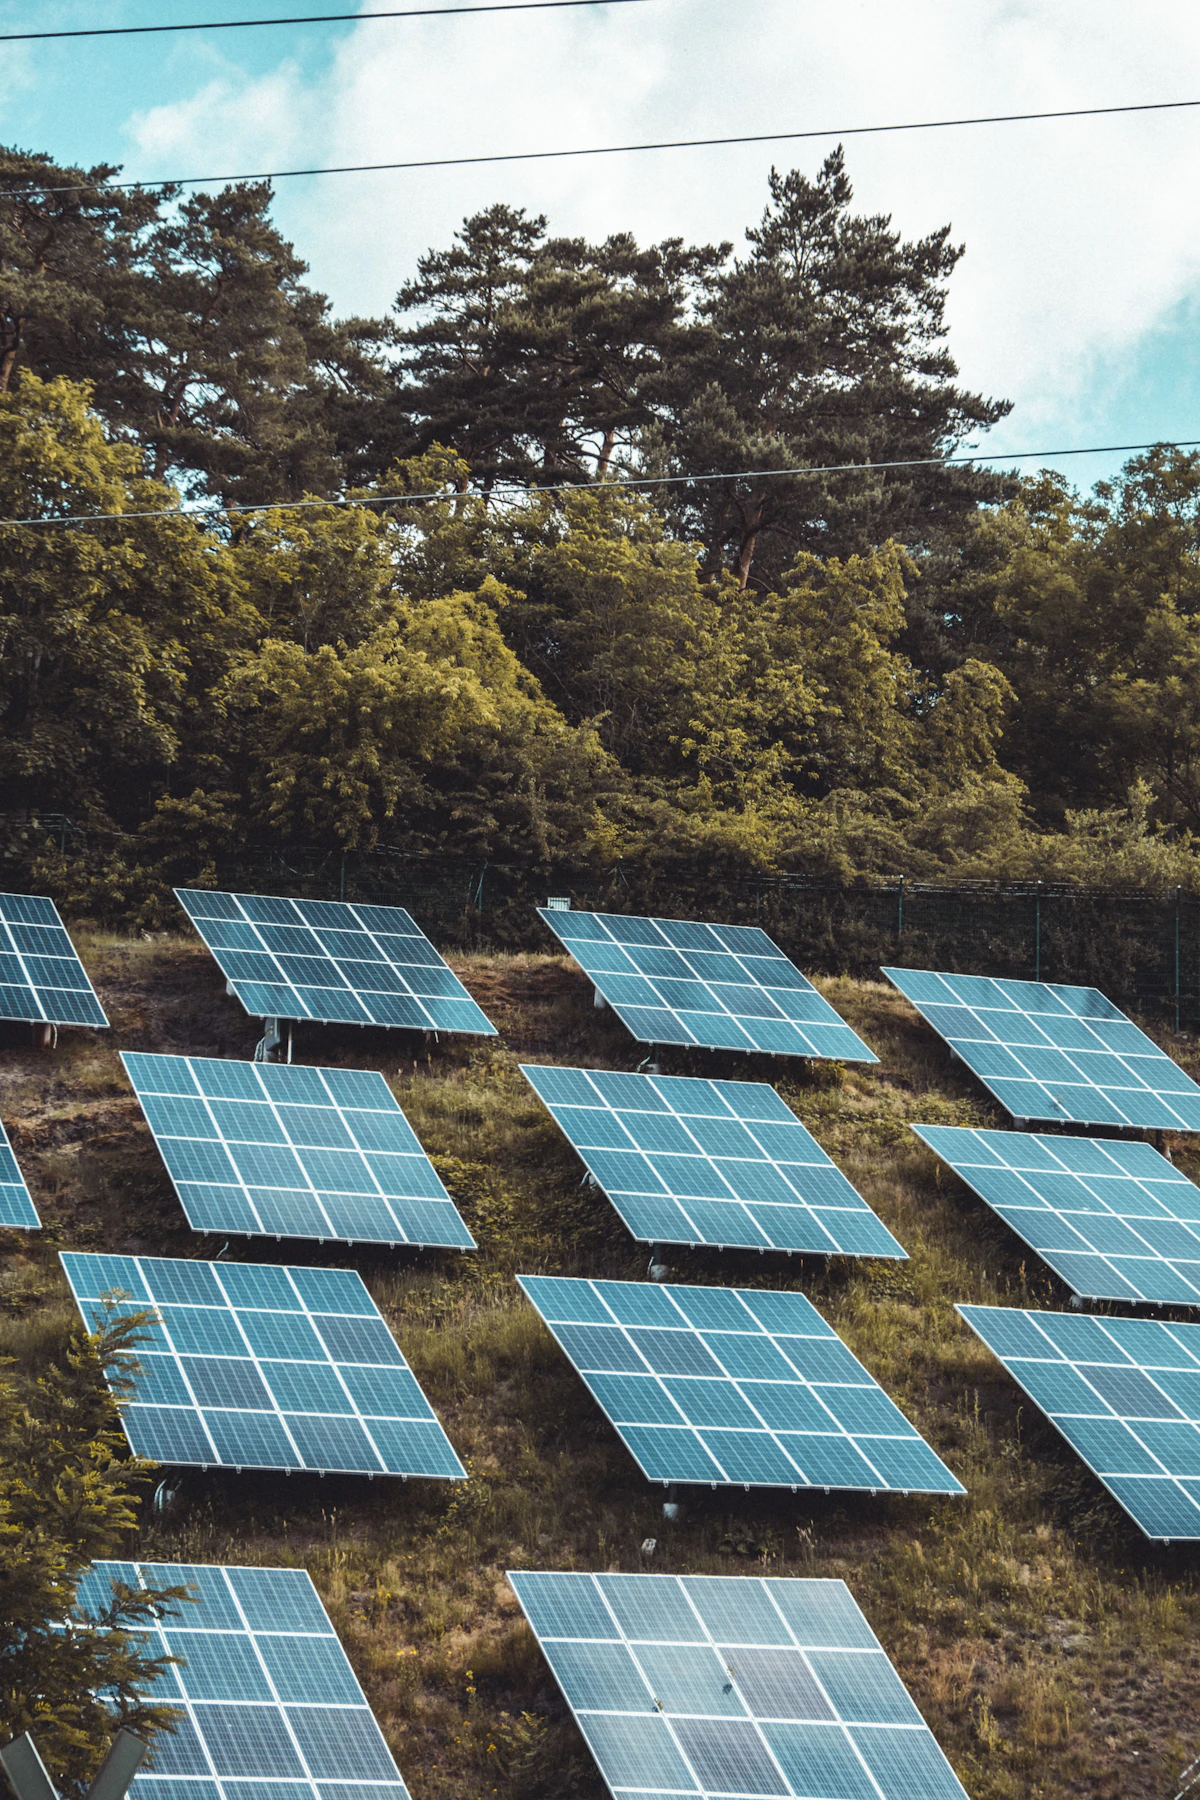
Phase 3: Grading and Slope Management
Ground-mounted solar arrays perform best on relatively flat terrain, but few real-world sites are perfectly level. Grading is the process of reshaping the land surface to create the uniform, stable base that the racking system requires. The acceptable slope range for most fixed-tilt ground-mounted systems is 0–10% in the north-south direction (along the row orientation) and up to 15–20% in the east-west direction, though steep cross-slopes add complexity to racking design.
Avoid over-grading. Aggressive cut-and-fill grading not only increases cost but also disrupts topsoil, which is essential for long-term vegetation establishment under and around the array. Wherever possible, design the racking layout to follow the natural contours of the land, using adjustable post heights and multi-pier racking sections to accommodate modest terrain variation without major earthwork.
Phase 4: Drainage Planning and Infrastructure
Proper stormwater management is one of the most frequently underestimated aspects of solar site preparation. Large arrays create extended impervious surfaces that alter natural water flow patterns — rainfall that previously soaked into vegetated soil now runs off the panel surfaces and drip edges at concentrated points. Without proper drainage design, this can lead to erosion channels beneath and around the array, sedimentation in nearby waterways, and structural undercutting of foundation posts.
Drainage planning for solar sites typically involves a combination of graded swales to channel runoff away from the array, French drains or perforated pipe in areas prone to pooling, gravel access roads that are crowned for drainage, and outlet structures where concentrated flows reach site boundaries. In many states, a stormwater management plan must be reviewed and approved as part of the permitting process.
Phase 5: Erosion Control During Construction
The construction phase — from ground-breaking through final vegetation establishment — is when solar sites are most vulnerable to erosion. Disturbed soil without vegetative cover is easily displaced by rain and wind, carrying sediment into drainage channels and off-site waterways. Erosion control measures must be in place before ground disturbance begins and maintained throughout the construction period.
| Erosion Control Method | Application | Effectiveness | Typical Cost |
|---|---|---|---|
| Silt fence | Site perimeter downhill edges | Good for fine sediment | Low |
| Straw wattles / fiber rolls | Slope interruption, swales | Good for slope runoff | Low–Medium |
| Erosion control blanket (ECB) | Seeded slopes and disturbed areas | Excellent for stabilizing seed | Medium |
| Hydroseeding | Large disturbed areas | Excellent long-term | Medium |
| Gravel construction entrance | Site access points | Prevents off-site mud tracking | Low–Medium |
Phase 6: Vegetation Establishment Under the Array
One of the most important — and most overlooked — aspects of large-scale solar land preparation is planning for long-term vegetation management beneath and around the array. Bare soil under solar panels is prone to weed invasion, erosion, and dust generation (which can reduce panel output). A well-planned groundcover strategy dramatically reduces ongoing maintenance costs.
The most effective approach for most sites is seeding the array area with a low-growing, shade-tolerant native grass or pollinator-friendly wildflower mix before or immediately after panel installation. Native vegetation is adapted to local rainfall patterns, requires no irrigation once established, needs only one or two mowing passes per year to stay below panel height, and provides habitat value that can be relevant to environmental permitting. The practice of combining solar arrays with pollinator habitat — sometimes called agrivoltaics or solar meadows — has grown significantly in recent years and can unlock additional environmental incentives in some jurisdictions.